

プログラム品質の検証、向上を図る方法はいくつかありますが、
今回はJUnitを取り上げます。
今回は以下の環境で実施しますが、
Eclipseなど、ほかのソフトウェアでも実施できます。
OS X 10.9
NetBeans 7.4
JDK 1.7
JUnit 4.10
NetBeans NetBeans日本語サイト
https://ja.netbeans.org/
今回はOS X向けのNetBeans7.4をインストールしました。
NetBeansで新規Javaアプリケーションを作成します。
プロジェクトとmain関数の雛形が作成されます。
/*
 * To change this license header, choose License Headers in Project Properties.
 * To change this template file, choose Tools | Templates
 * and open the template in the editor.
 */

package junitsample;

/**
 *
 * @author bloguser
 */
public class JunitSample {

    /**
     * @param args the command line arguments
     */
    public static void main(String[] args) {
        // TODO code application logic here
    }

}
新規クラスを追加します。
addメソッドは引数に1を足して返します。
/*
 * To change this license header, choose License Headers in Project Properties.
 * To change this template file, choose Tools | Templates
 * and open the template in the editor.
 */
package junitsample;

/**
 *
 * @author bloguser
 */
public class AddClass {

    public int add(int source) {
        return ++source;
    }
}
main関数にAddClass#addを呼び出す記述を追加します。
package junitsample;
/*
 * To change this license header, choose License Headers in Project Properties.
 * To change this template file, choose Tools | Templates
 * and open the template in the editor.
 */

/**
 *
 * @author bloguser
 */
public class JunitSample {

    /**
     * @param args the command line arguments
     */
    public static void main(String[] args) {
        // TODO code application logic here
        AddClass add = new AddClass();
        System.out.println(add.add(3));
    }
}
実行します。
3に1が足され、4が出力されました。
run:
4
ビルド成功(合計時間: 0秒)
テストコードを作成します。
addメソッドに数値を渡した結果、1を足された数値が返ることを確認します。
/*
 * To change this license header, choose License Headers in Project Properties.
 * To change this template file, choose Tools | Templates
 * and open the template in the editor.
 */
package junitsample;

import org.junit.Test;
import static org.junit.Assert.*;

/**
 *
 * @author bloguser
 */
public class AddClassTest {

    public AddClassTest() {
    }

    /**
     * Test of add method, of class AddClass.
     */
    @Test
    public void testAdd() {
        AddClass instance = new AddClass();
        int result = instance.add(1000);
        assertEquals(1001, result);
    }

}
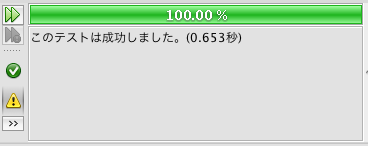
テストを実行します。
オールグリーン、成功しました。
ここまででAddClass#addの動作を検証しましたが、
仕様変更が起こった場合を想定し、AddClass#addに変更を加えます。
AddClass#addは100より大きい引数を受け取ると例外をスローするようになりました。
/*
 * To change this license header, choose License Headers in Project Properties.
 * To change this template file, choose Tools | Templates
 * and open the template in the editor.
 */
package junitsample;

/**
 *
 * @author bloguser
 */
public class AddClass {

    public int add(int source) {
        if (source > 100) {
            throw new java.lang.IllegalArgumentException(
                    "100より大きい引数は受け付けません");
        }
        return ++source;
    }
}
先ほどのテストコードを実行すると、今度はテスト失敗となります。
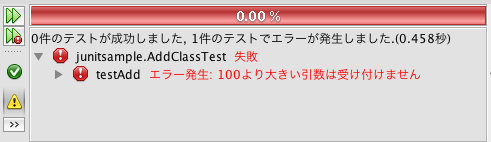
これまで正常ケースとされていた引数1000のケースで例外が発生するようになったため
テストが失敗するようになりました。
仕様変更に対応し、正常な引数は正常に処理されること、
また100より大きいパラメータを渡した場合は例外が発生することを確認します。
/*
 * To change this license header, choose License Headers in Project Properties.
 * To change this template file, choose Tools | Templates
 * and open the template in the editor.
 */
package junitsample;

import org.junit.Test;
import static org.junit.Assert.*;

/**
 *
 * @author bloguser
 */
public class AddClassTest {

    public AddClassTest() {
    }

    /**
     * Test of add method, of class AddClass.
     */
    @Test
    public void testAdd() {
        AddClass instance = new AddClass();
        int result = instance.add(100);
        assertEquals(101, result);
    }

    /**
     * Test of add method, of class AddClass.
     */
    @Test(expected = java.lang.IllegalArgumentException.class)
    public void testAddException() {
        AddClass instance = new AddClass();
        int result = instance.add(101);
    }

}
実行結果
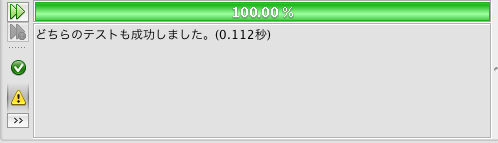
例外の検証を行いつつ、これまでの1を足すaddメソッド本来の動作も確認できました。
このように、動作が変わっていない箇所(引数が100以下の場合の動作)を検証するコードを保ちつつ、
新たな動作(引数が100を超える場合に例外をスローする)への検証コードを記述できるのは
UnitTestの利点の一つです。
なお、例外の発生を検証するテストは以下のようにtry~catchを使っても記述できます。
    /**
     * Test of add method, of class AddClass.
     */
    @Test
    public void testAddException() {
        AddClass instance = new AddClass();
        try {
            int result = instance.add(101);
        } catch (java.lang.IllegalArgumentException ex) {
            return;
        }
        fail("例外を通過していない");
    }
JUnitについて、今回の記事はここまでです。
「JUnitを使ってみた」第二回では、BMIを測定する処理をもとに、
結果が複数に分岐するテストコードについて考えています。
第二回の記事はこちら